Showing posts with label Model Railroading. Show all posts

Monday, January 15, 2024

2024 Railroad Hobby Show

MRC will be at the 2024 Railroad Hobby Show on January 27 and 28, 2024 ! 

Why don't you come visit us this year?


The Amherst Railway Society sponsors the Railroad Hobby Show. The society exists to give as many people as possible the opportunity to experience and learn from the railroad and model railroad hobbies.


Wednesday, February 1, 2017

VIDEO REVIEW: MRC's NEW Prodigy Wifi

Our friends over at Great Northern Railway got a chance to play with one of our new Prodigy Wifi modules and did a nice video showing just how easy it is to set up and run.  

Check it out.


Source: https://youtu.be/h-9snsRGRfw


Pretty cool huh?


There's a lot of advanced features that they didn't mention like how you can set up custom labels, create and store rosters and a lot more.

To learn all about it, visit http://www.modelrectifier.com/wifi

Friday, January 27, 2017

Video: Model Power 2-6-0 MOGUL: Pennsylvania - DCC & Sound

Check out this fantastic video from our friends over at trainworld.com about one of our 2-6-0 Moguls


You can check out all our Moguls and Americans here:  http://modelrectifier.com/nscalesteam

Monday, January 16, 2017

A funny short film, all about Model Railroading..

We came across this really funny short film, all about Model Railroading on Youtube.

At 19 minutes, it's a little long but if you love Model Railroading as much as we do, you'll probably get a real kick out of it.


Even though it appears to have been made during the 1970's, we noticed one of our Power supplies at 09:55 and I'm sure there's other MRC stuff hidden in there as well.

Just goes to show you that we've been at it for a long time!

If you happen to notice any more of our products, please send us a message & timecode.

We hope you enjoy and feel free to share this with your friends!

Wednesday, October 19, 2016

What you should know before buying a sound decoder...


Our technology makes them better…

Some decoders offer just 12 functions, MRC decoders deliver 28.  That means access to more functions while running, more choices of bells, whistles or horns. To assure maximum enjoyment and minimum tedium, our decoders allow you make changes on the fly. This avoids the hassle of stopping to reset a CV every time you want to change a horn or bell. These changes can be accomplished by simply using the function buttons. Our advanced decoder technology makes it easy to run your railroad. 

MRC Decoders Give you More...

More memory, more sounds, a difference you can hear… at this writing, our memory chips have four times more capacity than the nearest competitor.  This lets us put up to 34 different horns and 14 different bell sounds on a single chip, plus multiple prime movers, so you can pick the one that’s right for you. Our cutting edge decoder technology means we can do more. More memory means we don’t have to skimp on realism. If it’s in the real world, we’ll capture it for your real-life layout.   

Our Advanced Decoders Are Easy To Enjoy

Tiny drop-in sound decoders with matched speakers…

MRC’s engineers and tech experts are model railroaders. They understand that while building a railroad is a labor of love, it takes enormous time and effort. That’s why every decoder and system we make is designed to make life easier for you. It explains why no one has more convenient, easy to install, drop in sound decoders than MRC. These include our incredibly small, one-piece, dual mode N Scale on-board decoders, complete with mounted speakers.  

Want to change speakers? No need to test your soldering skills on a delicate PC board... because all our HO decoders have plugs for easy speaker change-outs. Just unplug one speaker and plug in another. MRC’s powerful speakers, aren’t just paired with any decoder. We make sure speakers are matched to decoders. The results are crisp, genuine sounds that elevate your model railroading enjoyment. 


Sound Facts About Decoders

Why are our decoder sounds so loud? Because we have nothing to hide… we’re not ashamed of our sounds. Each one was recorded from real locos on a real railroad. And not massaged in a studio. We want you to hear it all… the clanging, moans, groans, hisses and squeaks. We want our decoders to express the symphony of heavy metal that signals a genuine loco is at work… including all the ambient sounds of a real railroad.

On the other hand, decoders using distorted, synthesized sounds don’t want you to hear everything. Look at it this way. You can always lower our sounds if you like. But when decoders have been programmed to maintain low volume you can’t ever raise it enough to  hear the real sounds of a working railroad.


Find out what the competition doesn't want you to know about MRC sound decoders 

Decoder Facts

  • MRC offers by far the widest range of sound decoders
  • Each decoder comes with matched speakers
  • MRC decoders operate with all NMRA compatible DCC systems
  • Our O, G, HO and N scale decoders fit in most popular locomotives
  • For maximum realism, our sounds are recoded trackside from working engines, we don’t use computer generated or studio enhanced sounds

Decoder Differences
Real Digital Sounds from Real Prime Movers… ahhh the tricks of the trade. Some decoder makers record train sounds at idle and then play them back at a faster rate and higher volume. It sounds like the loco is actually notching up and picking up speed… when in reality all they’ve done is modify the same idle sound 

At MRC, our sound engineers go trackside and record each loco at its various speed notches. If the loco has eight notches, which most do, we record the eight notches in sequence as the RPMs are actually increasing. Our decoders allow you to hear a diesel motor actually change pitch relative to engine speed and load. When we say the sound is an actual SD45-2 with turbocharger or a specific GE or Alco loco, you can rest assured it’s for real. 


Thursday, October 6, 2016

Among the Shades of Green

Among the Shades of Green

If you are new to building scenery or an old hand at the craft, a good place to polish up your skills in adding scenery to a flat, open field.

Not only will this exercise quickly change the look of your layout but is also an example of tricking the eye into seeing more than is actually there. 


To get started, seal the area with flat earth colored latex paint. This is available at every paint and home improvement store. Custom mixed quarts and gallons can be mixed to order or for smaller jobs, many stores offer paint samples in smaller sizes for only a few dollars. One can also use acrylic craft paints that are sold at craft stores. This paint will provide a base for additional layers of scenery materials that will be applied in stages. 

With the base coat dry, apply an even layer of full strength scenery cement and sift a thin layer of earth colored fine turf into the glue. A light misting of water with a few drops of liquid detergent over top of this layer will help the glue penetrate the turf to firmly affix this starter course. An alternative for this base coat of turf when covering a flat surface is to cut a piece of earth colored grass mat material to size and glue in place. 


The field will start to come to life when a thinned half glue and half water mixture of scenery cement is applied over the earth turf and a light coat of moss green is sifted over top. Make certain to leave some open spots and vary the depth of the green turf. Mist over this first green layer with the spray bottle with the ‘wet’ water and allow it to dry.

Mist the field with the spray bottle and very lightly sift a thin layer of grass green turf followed by an equally thin application of yellow turf to provide high lights. Work from the front of the project to the rear adding more of the darker green to the foreground and more lighter highlights towards the rear. This will simulate have the eye sees closer objects as being darker and object farther away are usually seen as being lighter.

Mix up a spray bottle with four parts water, one part scenery cement and a couple of drops of liquid detergent. Now lightly spray the glue mix over the entire field. While the field is still wet randomly scatter some dark green coarse turf to simulate those random darkly colored weeds that seem to spring up in almost every field. Over spray this layer with the glue mixture as well. 


At this juncture the field has taken shape. The variety of colors and textures not only adds realism to the scene but also creates the illusion of size and depth. The various shades appear to have added relief to an otherwise completely flat surface. The next step is to add additional detail to the field with the inclusion of larger scrubs and bushes made using foliage clumps and by adding some trees along the edge plus a simple fence constructed of fancy tooth picks and rust colored thread. Tall grasses created by the use of JTT detachable wheat and flower bushes flank the right of way to clearly define open fields from busy main line. The different colors and textures along with a few other details will enhance the realism of an otherwise simple scene. 
Author:George Riley

This article is from "Detailing Scenery with MRC - JTT Landscaping Tips and Techniques.
CLICK HERE to download the entire magazine.


Materials used for this project
  • 95128 Fine Earth Turf or 95411 Golden Straw Grass Mat
  • 95134 Burnt Grass Ground Cover Turf fine
  • 95132 Yellow Straw Ground Cover Turf fine
  • 95138 Dark Green Ground Cover Turf fine
  • 95008 Grass Green Ground Cover Turf Medium
  • 95137 Moss Green Ground Cover Turf Coarse
  • 95139 Dark Green Ground Cover Turf Course
  • 95146 Blossom Flowering Turfs Medium
  • 95057 Light Green Foliage-Fiber Cluster Coarse
  • 95058 Medium Green Foliage-Fiber Cluster Coarse
  • 95581 Detachable flower bushes
  • 95579 Detachable Wheat Bushes
  • Saplings (1 pack ea.)
  • 3 or 4 Assorted JTT Trees

Wednesday, October 5, 2016

Creating a Realistic WWII Vignette with JTT Scenery Products

The following is an  article by Big Bill Schwarz, president NJIPMS


Creating a Realistic WWII Vignette with JTT Scenery Products 


My club, NJIPMS here in New Jersey does group builds about once a year. This year’s theme (2012) was 1/48th scale OTAKI models. The theme was to see what could be built out of these great old kits. The model pictured here is an OTAKI KI-44 TOJO. I usually put my models on a base to show perspective and natural surroundings. I wanted to show a remote pacific island in WWII. With the help of JTT Scenery, mission accomplished.

My base was made from a round wooden clock mounting base. After prepping and sanding the base for tooth to put the scenery on, I used carpenters glue and laid down the plank base on which the airplane sits. The planks are coffee stirrers from the dollar store which I stained for visual effect. Now comes the fun part. The initial ground work was laid down using Celluclay, tinted with tan latex house paint and mixed with white glue. I spread it on the base with an old knife, stippled it with an old paint brush and wiped off the edges. This gives a natural, uneven look to the ground. At this time, I also added the various JTT palm trees and hedges.  

Next up was a layer of diluted white glue on the ground to lay the turf on. I used a mixture of fine tan ballast, some shades of green turf, and around the trees and shrubbery I blended textures of foliage to simulate dead leaves and plants. When that was dry, I added the various flowering plants and some different brown turf textures to blend everything together. When that was all dry, I shot a clear flat coat tinted with a bit of khaki paint to tone down and blend in the colors. I was happy with the result. I mounted my TOJO and the base was complete as was the WWII pacific island theme. The pilot adds the final touch and he even has his Samurai sword.  

All of the products used on the base with the exception of one palm tree came directly from JTT Scenery Products. The palms, the hedges, the flowering plants, the sand colored ballast are all in the catalog. JTT has a broad line of trees, plants, hedges and scenic accessories. They are extremely easy to use and with a little work they’ll help you create the scenic environment you want to achieve. I recommend the use of JTT Scenery Products. I have been modeling for 30 some odd years and have used a lot of products for my vignettes and I would rank JTT Scenery Products right up there with the best. Look into their line of products and have fun. I certainly did.


Monday, October 3, 2016

Flowering Meadows and Grassland Landscaping

The following is an  article by Tom Staley, owner of Tom’s Train Station, Raleigh, NC.


Among the JTT scenery products introduced this year are two great items, flowering meadows and grassland landscaping, both of which are part of the Landscaping Detail Series.

Red

Yellow


Purple

The flowering meadows come in red (0595604), yellow (0595605), and purple (0595606). The grassland landscaping comes in green (0595601), wild (0595602), and golden (0595603). Now, you might not get excited until you open the packages and put it in your hand and start to use it. Versatile, they can be used in hundreds of places.

Both the flowering meadows and grassland landscaping come on 5” x 7” sheets. This allows you to glue the sheets directly to your layout. And being no two sheets are exactly alike, you can place the sheets next to each other and still attain realism and create maximum interest.  They also work in a random pattern.  I like cutting several flowering meadows bushes out of a sheet and gluing them randomly around my layout.  The three colors will make your layout landscaping pop out and look great. Because the bushes are different heights, they not only add beauty, they also give your layout a depth dimension.


Green


Wild


Golden

My favorite one was the green grassland landscaping (0595601).  All I had to do was to add a fence to it and add some cows and I had great fenced cattle pen.

The two products are easy to use and give your layout a neat look.  The hint of colors on the bushes is just another one the details that gives you that professional look.  You will get attention, I promise.

JTT has kept the cost affordable.  So don’t miss out on this new product…another must have!!
  

My tip of the month is an easy one for planting JTT fruit trees.  Place some of the available loose apple, orange, and lemon fruits on the ground under the trees, this will give a more authentic look to your orchard

Friday, September 30, 2016

Using JTT Sunflowers and JTT Corn Stalks.

Using JTT Sunflowers and JTT Corn Stalks.


JTT’s series of scale trees and landscaping continues to blossom with new and unique scenery products, including flowering hedges, corn stalks, sunflowers, tomato plants, fruit trees, grasses and more. These and other introductions have led to requests for techniques and ideas for creating more realistic layouts. This is the first in a continuing series… we’ll start with an article by Tom Staley on using JTT Sunflowers and JTT Corn Stalks.


I have been doing landscaping and teaching scenery classes for many years. When JTT introduced sunflowers and corn stalks, I was like a kid in a candy store. I always wanted to put sunflowers and fields of corn on my layout and now I can.  Both the sunflowers and corn stalks are available in HO scale at 1” and in O scale at 2”. Mixing both scales of sunflowers gives you a natural look. It enables you to mimic nature by showing both young and mature plants in the same area.

What I especially liked about both the sunflowers and the corn is that they look so real. Talk about putting the “WOW” in your layout, this will do it.  They are colorful, affordable and available. If you think about it, most modelers have too much green on their layouts. Adding JTT sunflowers with their yellow, brown and green hues, and bright, detailed corn stalks give you color, realism and pop. They add interest to your layout.

Landscaping Tips You Can Use


Prior to planting the sunflowers, sprinkle JTT leaves on the ground where you plan to place your sunflowers. Then make a 50/50 combination of white glue and water and mix well. Using an eye dropper put several drops of the glue mixture on the leaves. You’ll see the leaves darken providing a true, earthy look.

Before planting JTT corn, rake some leaves to make small, raised rows. You may want to put a few drops of alcohol (found at the drugstore) on the rows. Modelers refer to this as breaking the tension. Then, using an eye dropper, apply white glue. The alcohol helps the leaves absorb the white glue delivering more natural looking results. Once the leaves are prepared, you can plant your corn.


Putting sunflowers around old buildings, bridges, windmills and in your gardens is one of the easiest things you can do to add authenticity to your layout. Anyone, regardless of skill level, can do this and get excellent results.

Visit your local hobby dealer and start adding JTT scale landscaping and scenery products to your layout, you’ll be delighted with the final results.


Monday, September 26, 2016

Plant an Orchard on your Layout

The following article and layouts by George Riley, Railroad Model Craftsman
Plant an Orchard on your Layout

Properly modeled, orchards can enhance a model railroad's scenery as well as providing a potential source of traffic. Several packs of JTT Orange Trees were used to create this orange grove scene; nearly any type of orchard can be modeled by planting the proper trees. Add a processing or packing plant nearby and your railroad can have a new customer in no time!

From their earliest years in operation, the railroads played a crucial role in feeding the nation’s growing cities. Food stuffs and agricultural products were among some of the first consigned revenue producing lading to ply the rails. Fruit and nuts from recently planted orchards shared space with the vegetables, grain and livestock that funneled into the rapidly expanding eastern and Midwestern cities during the first half of the nineteenth century.

While orchards were not a uniquely European enterprise, the Native Americans had originally planted orchards in the pre-Columbian era; they spread from coast to coast during the westward expansion of these immigrants. From the citrus groves of California and Florida; to the apple orchards of the Mid Atlantic and Midwestern States and the peach orchards of Georgia and the Carolinas, fruit production and processing plays an important part in the country’s economy and provides an important seasonal revue stream to many railroads.

Properly modeled, orchards can enhance a model railroad's scenery as well as providing a potential source of traffic. With a little research and by carefully observing the scientific practices of fruit production one can present a realistic model of this common agricultural enterprise.


Begin by laying out the area that will be planted on the layout or as is the case of our orange grove, a piece of birch plywood that will later be added to the layout. Orchards are arranged so that a tree will produce the maximum yield in the minimum of space while allowing access for cultivation and harvesting. Holes were drilled in rows two inches apart with three inches between each row to accommodate a service path and still leave space between the trees. Another ‘trick’ used to make the orchard look larger was to lay out the rows on a curve. This fools the eye since while we can easily measure by eye the distance of a straight line while a curved line’s length is much more difficult to determine.


After the holes for the trees were drilled the board was sealed overall and the surface was primed and painted. This step not only helps stabilize the board and limits the effects of seasonal humidity, but also prevents the plywood from warping and the plys from separating when using water based glues and water to apply the ground cover.

A coat of 75% white glue or matt medium mixed with 25% water and a few drops of dishwashing liquid is applied over the entire surface to hold a thin layer of dirt onto the base. Water with a few drops of dishwashing liquid or denatured alcohol is then sprayed over the earth cover. Lightly wetting the dirt allows the adhesive to wick up through the ground cover to lock the earth in
place. Too much water will often cause the earth layer to crack which in many situations makes for added realism. Allow the dirt layer to completely dry before proceeding with the application of grass.
Leaving a roughly on inch earthen path between each row, apply a coat of the glue/water mixture over the earth ground cover. Add your choice of grass material to the glue and over spay with a light mist of the "wet" water. Allow the ground cover to dry completely. Once the grass layer is completely dry remove any excess material and give the entire area a light overspray of hairspray from a pump spay bottle. Inexpensive non-scented hairspray in pump bottles is readily available a most dollar stores.

Short static grass was used on the orange grove model to good effect. One does not necessary need to use a static grass applicator for this step since inexpensive squeeze bottles are available that yield good results when working with small areas.
Give the base an over all dry bushing with a light tan paint to accent the ground cover and add highlights. Plant the fruit trees in the predrilled holes. Hold them in place with a clear drying PVA glue such a Aleene’s Tacky Glue or Woodland Scenics Scenic Accents Glue. Several packs of JTT Orange Trees (Item #0592121) were used to assemble our orange grove scene. Nearly any type of orchard can be modeled by planting the proper representative fruit trees. Add a processing or packing plant nearby and your railroad can have a new customer.
*A version of this article was published on Railroad Model Craftsman Extra Board - March 2013. All photos are taken by the author George Riley. 

JTT Scenery Quick Tips

JTT makes a world of scenery that adds that professional touch to any model railroad, military model, diorama or even doll house.

All of the products are easy to use and will yield superior results. To illustrate some of the many ways that JTT Scenery can be used here are some quick, simple and effective scenery tips.

JTT Scenery Detail Sheets are a quick way to fill in that open patch of ground be it a vacant lot, small pasture or overgrown field. These sheets also let one model different environments and seasons.


Step 1 – Cut the sheet to fit the space. This can be done using a pair of scissors or hobby knife.

Step 2 – Remove the Kraft paper backing
Step 3 – Glue in place using scenery cement, matte medium or white glue. Once the glue is dry blend in the edges with some loose ground cover and the scenery is done. Simple, Easy, Fast.
Add Curb appeal to your residential areas.
The addition of flowering plants, shrubs and bushes around the yard will really add to the realism and detail of any residential scene.
Plant a vegetable garden out back.
Most family run farms as well as a lot of homes have a small plot set aside to grow vegetables and herbs for the kitchen. A couple of packs of JTT HO or O scale corn plants is a great start to any garden. Add a few rows of row crops and even a tomato plant or two to round out the selection. This will not only add detail, but will also be a focal point that will draw attention to the scene.
Mix and Match different products to replicate different times of the year.
A set of JTT O scale pumpkins coupled with some JTT dry vines sets the scene as the pumpkins are ready for the fall harvest.
Add Biodiversity to your project.
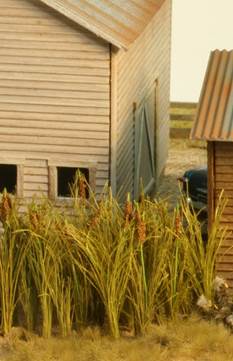
In the real world one will see a wide range of different plants in any scene. Don’t limit your model world to just a few species. Add a stand of JTT cat tails to that wet spot by the pond or some tall try grass, some dry leaves and a tree behind the shed.
Use different scenery products to create different seasons.
JTT scenery comes in a wide variety of seasonal types. Winter, spring, summer or fall can easily be realistically replicated. Here JTT dead tries, dry vines, loose leaf ground cover and dry leaf foliage branches create a convincing late fall forest scene.


Click here to learn more about our JTT line of Scenery Products

Friday, September 23, 2016

Model Railroading: A Multi-Dimensional Hobby - Part 3

Model Railroading: A Multi-Dimensional Hobby - Part 3 - Track Planning

This is the part 3 of a series of articles exploring the changing face of model railroading and how it continues to evolve into a contemporary, varied, fulfilling and exhilarating hobby.

The last article discussed the development of the benchwork for the layout. The main job of the benchwork is, of course, to hold up the track. So it begs the question of what to consider when developing a track plan. This article will take a high level look into the various considerations of track planning. Note that this is only a high level look. Dozens of books have been written discussing model railroad track planning ideas. Additionally, hundreds if not thousands of track plans have been presented in various magazine and on-line articles. Furthermore, there are on-line groups that have members who constantly discuss the various nuances of different track plans. This article is a very brief introduction, I encourage you to do additional research as your track plan is developed. A lot of time goes into a layout, so it’s best to invest some time up front to be sure you end up with something you like.


Yards are busy places where the railroad breaks up and makes up trains.

Track Planning Basics
Before pulling out a pencil and pad, or even your favorite software, take some time to consider what the purpose of your layout actually is. If it is your first layout, it’s probably best to keep the track plan simple; perhaps a loop with a siding or two. This is also ideal to get some techniques and skills developed before embarking on a larger project. On the other end of the spectrum is to model a specific prototype or a large operating model railroad. Some folks want to model a particular scene or region or develop a specific operating scheme. This can be a lot of fun, bringing together hobby interests with researching history. Most people shoot for something in between. 
The next step is to develop a list of “givens and druthers,” a term coined by the late John Armstrong, generally considered to the dean of track planning. Check out his book “Track Planning for Realistic Operation” for an excellent treatise on this topic. On this list “of givens and druthers” identify all the key elements you want included in your plan. Givens are, of course, the elements you really want. Druthers will be elements that you would like, but are negotiable. Also include some design criteria such as:

  • Minimum Radius: what is the ‘sharpest’ turn you would like to see on the layout? This will generally define the type of equipment you can run. The last article included some considerations on track radii, presented again for reference: Model railroad radii are generally categorized into “sharp,” “conventional” and “broad” curves. The following table summarizes these for some of the most popular scales:
Radius
Curve Category O-scale HO-scale N-scale
Sharp 36” or less 18” or less 9” or less
Conventional 48 — 60” 24 — 30” 12 — 15”
Broad Greater than 60” Greater than 30” Greater than 15”


  • Maximum Grade if you are using differing elevations. Grade is generally expressed as a percent. One percent grade means it will raise one foot per hundred feet of run; 2% = 2 feet per hundred feet. Of course, feet of rise are pretty extreme on a model railroad, so generally it’s measured as so many fractions of an inch per foot of run. A practical maximum grade on any layout is around 4% with 3% allowing for much more reliable operation. Many owners limit their layout to 2% or less.
  • Clearance between tracks. For trains to cross over each other, there has to be enough space between the tracks. In HO, for example, this is typically considered no less than 3”. Less than that, and it makes supporting the track difficult, or if even less, risk of tall equipment not fitting through the crossing.
  • Height above the floor. Placing a layout close to the floor makes it uncomfortable to operate. However, if small children are going to be using it, keeping it within 2 feet of the floor is probably good. A very comfortable height for building and operating is roughly 3’ above the floor. Moving into the range of 40”- 50” provides a much more realistic perspective when running the trains. Some layouts extend even higher, reaching above head height. These are generally associated with double-deck layouts, allowing much more model railroad to be built within a fixed area.
  • People space. Sounds obvious, but it is so very tempting to fill up a space with a layout only to find there is barely enough room to get in and out of the space, let alone if others are there as well. A good rule of thumb is to provide 3 feet of width along the layout for people access; less for short distances if needed to accommodate some design feature; more if there will be people congregating in a certain area like yards.
  • Reach access. While layouts with large expanses of scenery look great, access will always be required to build the scenery and track, as well as to repair and maintain the layout as required. A good standard is to be able to reach everywhere with no more than 30” from the nearest edge of the layout. This will be reduced if the layout is higher. Some layouts are much narrower, with widths or reach-in depths of 16” or less.

Once a concept and criteria have been developed, the next step is to develop some conceptual sketches. These are not necessarily exact, but close to scale, showing the major pieces of the plan: the space available, the main line, maybe some constraints. So pull out a sketch pad (one with graph paper works very well), a soft pencil and an eraser. Optional is a straight edge and compass or circle template. Box out the space you have available. First step is to lay in the key curves of the mainline. Get a feel of the radius and diameter of the curves as it is laid in the available space. You may be surprised how quickly the space is consumed! Once the turns are defined, connect them with straight segments and look at the overall track plan. Does it make sense? Then move on to adding some locations for cities, signature scenes or other elements. 
As mentioned, a lot of inspiration can come from books, magazines and on-line. Some of these plans may have elements or signature scenes that really appeal to you and you would like incorporated. In those cases, print out the plans and designs of interest to approximately the scale you are sketching in, and cut out the part that appeals to you. Between the paper and pencil, and optionally taping the elements onto the area you would like to see it, the plan can be developed to include your designed segment. Keep in mind plans can be flipped or mirrored to make them work better. Most home PC photo viewers have the option of easily making these edits.


A remote industry along the tracks can make an interest scene and provides enjoyment in switching.

As the plans are developed, some additional considerations should be addressed:


  • Parallel tracks spacing
  • Curved track spacing
  • Avoiding S-curves — trains have a hard time negotiating them. If you have to have S-curves, provide a short straight segment of track between them.
  • Keeping at least 2-3 inches between the edge of the layout and the nearest track.
  • Any kind of reverse loop — a place where the tracks loop back on themselves, will require special handling of the power feed.

Most people find they will develop several dozen sketches as they sort out options and ideas. As mentioned, a lot of good ideas can be found looking through track planning books and articles. The internet also is a great resource for ideas. Sketch, gather more ideas, modify, resketch... repeat. Once you have a plan you like, go through the checklist and criteria again to see if there were any compromises. If you see some, go back to the drawing board. Fudging dimensions in the planning stages guarantees problems later on.


S-curves can be bad if they are short radius and without a straight section of track between the turns. Open up the curves and add a little straight section, and they can become center-pieces of the layout scenery. Sidings are to provide a place where trains can pass.


S-curves can be bad if they are short radius and without a straight section of track between the turns. Open up the curves and add a little straight section, and they can become center-pieces of the layout scenery. Sidings are to provide a place where trains can pass.

A few other points to be considerations as the track plan is developed :

  • Continuous run vs not. A continuous run design allows a train to endlessly circle the layout. It’s a great way to “just run trains” as well as to allow locos to be broken in without a lot of fuss. That said, if you don’t have the room for a complete turnback, a simple “point to point” layout can be fun too. The prototype railroads rarely have turning loops, and most trains are run point to point, where they are broken down at each end of the run.
  • Mainline vs switching areas. Is your interest in running long trains through rambling scenery? Do you like the idea of running a local in and out of industrial spurs to pick up cars? Both can be fun.
  • Staging. Staging is a place for storing trains when not needed. These can be open, resembling a yard, hidden, say behind a partition, located in another room, or above or below the layout itself.
  • Freight yards. A place to break up and make up trains.
  • Passenger Terminals. A place for passenger trains to originate, terminate or pass through.
  • Sidings. Tracks to allow trains to pass each other.

A congested industrial area can keep an operator busy for the better part of an evening!

Detailed Design
Once the rough layout of the conceptual track plan is developed, the work moves into developing a detailed design. Until now, sketches were sufficient, it now becomes important to detail each and every element of track. This can be done either by the old fashioned pencil and paper method or by a CAD program. If going the pencil and paper route, it’s often helpful to purchase a template to make sure switch angles are correct, radii are consistent and so forth. CAD programs range from free downloads to fairly sophisticated packages that include a 3D rendering of the completed layout. Some even let you run virtual trains on the computer, a good way to test run your layout before the first stick of wood is cut!


Keep in mind cross-overs are s-curves. Here we see 85' cars negotiating a #6 crossover. Note the off-set on the car ends. Doable, but not at high speeds. #8 switches would have done much better here. Longer cars look better on larger radius curves.

Once the detailed track plan is completed, it’s a good idea to copy it or print it out, and hang it up someplace and let it gel for a while. You will likely find the plan requires tweaks, adjustments and modest improvements. That’s fine. Mark up the drawing and make the changes. The track plan will never be perfect, but once it reaches a level of comfort, it’s time to start building. Even once building starts, it is likely that you will find some adjustments and changes that are necessary or even just desired. That’s OK.

Make It Happen
As mentioned, this brief article only scratches the surface of track planning. I strongly encourage you to get a few books on the subject. Check out some track plans that appeal to you. If you have the option, visit a few layouts that are similar in size and concept to what you are interested in building. Share your ideas with others and ask for feedback. With a good plan, you will find the layout will come together nicely. Track planning can actually be as much fun as developing the layout itself. It is, after all, a hobby. Enjoy the process!

Author: Detlef Kurpanek

NOTE: Finding the right Track Plan
Probably the best track planning book I have every come across is “Track Planning For Realistic Operation,” by John Armstrong.  There are a lot of other track planning books out there as well. Find one that fits your interests, budget, and available space. Another resource is Model Railroader’s track planning database:  http://mrr.trains.com/how-to/track-plan-database  Any internet search will also yield dozens of plans. Finally, don’t discount considering prototype locations and “selectively compressing” the key features into the layout space you have available.

Thursday, September 22, 2016

Model Railroading - A Multi-Dimensional Hobby - Part 2

MODEL RAILROADING

A Multi-Dimensional Hobby - Part 2 - Benchwork

This is the part 2 of a series of articles exploring the changing face of model railroading and how it continues to evolve into a contemporary, varied, fulfilling and exhilarating hobby.

The last article talked about the amazing breadth of the hobby - ranging from research and design, to operations and recreating a segment of history. In this article, we will be looking at the benchwork required for a model railroad.

Benchwork is the foundation, the basic support structure for the model railroad layout. Over the years, different approaches to benchwork have developed. Traditionally, the first step in graduating from simply setting up track on the floor is to a sheet of plywood, framed out in some fashion to prevent sagging, supported by legs. Most common is the classic “4’x8’” sheet of plywood, which provides enough width to make a useable, albeit tight turn and enough width between the turns to allow a little straight run for a few sidings and some scenery. A quick internet search or even paging through some track plan books will generally yield dozens of track plans suitable for the 4x8 tabletop.

Before we go much further on the topic of benchwork, a word about track curve radius is in order. Trains are large, long, moving machines, and on the prototype (full-size), they need a lot of room for making a direction change. A “tight” turn on the prototype is on the order of a 700’ radius, and is generally reserved for industrial spurs. Translating this in to HO scale would require over an 8 foot radius - of course twice that or 16’ diameter for a full turn back! Naturally this is not practical for most layouts. As such, compromises need to be made to allow model trains to be run.


Here we see all three benchwork methods in use. The layout to the left is a conventional table-top construction. It uses two sheets of foam to allow some relief of the scenery by cutting out sections of the foam. Lower right is an example of open grid benchwork. Scenery is able to rise above and below the track.Above that section is an example of classic shelf style benchwork. Shelf brackets support a framework of 1x4 boards and plywood.

Model railroad radii are generally categorized into “sharp,” “conventional” and “broad” curves. The following table summarizes these for some of the most popular scales:

Radius
Curve Category O-scale HO-scale N-scale
Sharp 36” or less 18” or less 9” or less
Conventional 48 - 60” 24 - 30” 12 - 15”
Broad Greater than 60” Greater than 30” Greater than 15”


The reason curve radii are important is they define the requirements for the track plan, and consequently, the benchwork. Note for example, a 4’x8’ table top is wide enough to accommodate an 18” radius turn of 180 degrees on each end, with a little to spare (18” - 1’- 6”; since it is a radius, there’s a need for 2X for diameter, or 36” or 3’-0”). Theoretically a 24” radius curve will fit on a 4x8, but keep in mind the radius is measured from the centerline of the track. If a 24” radius will be used, the centerline of the track will fit on the 4x8 plywood, but half the track at the ends will be overhanging the edge of the table.

The other element to be aware of when configuring the track radius is the maximum size of equipment that can be run. If the layout will run short cars and short locomotives, a sharp radius curve standard may not be a problem. There are many logging lines that have been modeled in HO with track radii of 16” or even less. However if the desire is to run long steam or diesel locomotives, perhaps trailing a crack passenger train of 85’ cars, broad curves are in order. There are some longer cars that manufacturers will claim can be run on conventional curves, but keep in mind their operation will likely be compromised (don’t try to back them up!) and they will sure look a lot better on a wider curve.

Generally, track planning and development of benchwork will end up being a compromise between the two. Rare is the model railroader who feels they have all the room they need to run the equipment they want. Make the choices that make sense to you, and stick with them. On that note, many model railroads go so far as to write up standards to assure they don’t compromise their own design. The standards include specifying minimum radius for the layout, maximum length of cars and even required clearances to the edge of benchwork. But all this is fodder for another article.

A variation of the table-top 4x8 is what is called a “cookie cutter” type design. The flat table-top 4’x8’ leaves little opportunity to provide scenic elevation changes and vertical relief to the scene. The cookie-cutter layout concept is to take the same sheet of plywood and cut a pattern into it that will allow segments to be raised or lowered relative to each other. Spacer blocks are provided to support elements of the table relative to others. It might seem minor, but even 2-3 inches of relief remarkably enhances any layout. Note that these pieces do not need to be cut apart. A lobe can be cut into the plywood and raised, allowing for the connecting plywood to create a smooth vertical transition to mount track or roadways between the differing elevations.

There are some notable drawbacks to the table-top design, primary of which is it is a darn big intrusion into a room. A 4x8 requires access all around. The table top is too deep to reach across. Therefore some kind of access is required along the back, even if narrow. This causes the table to protrude even further into the room. This is fine as a small layout in a spare room, perhaps an unused portion of a basement or even garage. But if a larger layout is desired, or if space is at a premium, other options must be considered. After some time with the trusty 4x8 layout, most modelers will move into another design. Enter the shelf layout.

The shelf layout, as its name implies, is set up not unlike a bookshelf would be. Brackets affix to the wall, and some kind of shelf is provided to develop the layout. The shelf can be as narrow or deep as desired, but typically is not less than 6” deep to leave room for scenery, nor is it generally more than 24” deep to allow reasonable access to the back (as well as the practicality of supporting a shelf that deep). The shelving system can be set up around the entire room to create a loop or even spiral if additional run length is desired, or just run along one or two walls. Note that shelf layouts really do not have enough room for a “turn-back” on the shelf itself (unless in the smaller scales). However, the linear design generally allows for a more natural and realistic flow of scenery. Another advantage is the wall immediately becomes available as a backdrop to the layout. Painting of the wall or even photo murals can be used to enhance the visual depth of the model. Similarly, a second shelf can be placed above the layout, provided with a valence, creating a convenient place for adding layout lighting, as well as framing the layout into a visual vignette.

The most flexible approach to benchwork is the development of a true independent structure. These are generally developed using individual pieces of dimensional lumber and plywood. They are pieced together in a lattice framework of legs, joists, risers and track subroadbed. They will also generally incorporate provisions for the support of backdrops and fascia to provide a finished look to the layout. “Open Grid,” as this benchwork is called, allows the modeler to place the tracks anywhere and at any elevation. Scenery can drop below the tracks, or tower above. It is entirely up to the individual. There are many books on the subject and it is worth reading a few of them to gain understanding of the different designs and methods of this benchwork.

Open Grid benchwork is also by far the most complex to develop, however, it is by no means out of the reach of ordinary hobbyists to build. Rather than technical knowledge or craftsman skills, what is required most is patience in working through the details. A quarter-inch vertical off-set may not appear to be much, but will cause significant problems later on when setting the track. That said, it is still easily correctable through the use of shims and sanding. Careful planning, some basic skills with wood, patient assembly of the pieces, and an eye toward the final goal will yield a very satisfying and reliable structure.


The backdrop of a blue sky is constructed of masonite. Above that is a valence of black painted masonite to provide a finished edge. On the front of the layout are signs, control panels, operations paperwork boxes and some shelves for convenience. A masonite facia provides a clean, finished front to the layout.

Before we leave the topic of benchwork, it is worth discussing a little about the actual track support, the “subroadbed.” Track needs to be supported. Additionally this support has to provide a few additional things: it needs to be smooth, without sudden changes in height. It needs to be sturdy enough such that it will not sag, particularly over time. It also needs to provide a means of accepting nails or at least some means of attachment of the track to the sub-roadbed. Traditional plywood has done well for all these elements. Plywood should be at least 3/8” thick, and most modelers prefer 1/2". However plywood is very hard to hammer small track nails into. Additionally with the plywood acting as the bearing surface for the track, the track will be at the same elevation as the scenery. On the prototype, tracks are generally set on ballast, raised above the surrounding terrain. So often a strip of cork is installed over the plywood and before the track is laid. Cork roadbed is sold with a pre-cut edge to mimic the natural slope of the ballast. This provides a realistic elevation to the track, while providing a soft surface to smooth out any irregularities or gaps. Besides cork, some modelers prefer a paper-board product called Homosote®. This accepts nails quite readily and has the added advantage of deadening sound. A relatively new option is the use of insulating foam sheets (the solid sheet type, not the white beaded type) for both subroadbed and roadbed. It provides a lighter structure and is easily cut and shaped. Attachment of the track can be by conventional track nails, scale spikes or even wire brads. Some modelers prefer their track to be attached with caulk or other non-solvent based glue to get rid of any evidence of oversized nailheads when the layout is complete.

Each of the benchwork and track subroadbed styles have their own best application and advantages. Often multiple methods will be used in developing a layout. For example, there may be a peninsula in the room using the open grid benchwork; tracks will run along the wall using a shelf system, and a yard area perhaps will use a conventional table-top method. Feel free to adjust the designs to suit the need.

Benchwork may appear to be a daunting element of model railroading. However, it is really is not that difficult and can even be fun to develop. Different approaches and designs allow it to be adjusted to meet the needs of the layout. While there are some design and construction considerations that need to be made, the work is well within the capability of any individual interested in doing so. And once completed, you will be ready to move into the next phase of building the layout - laying track!

Author: Detlef Kurpanek
What's New & How To
Our ever-changing "What's New & How To" feature will highlight everything you want to know about MRC products and your hobby and market trends. There'll be how-to articles and new product announcements. You'll find FAQs on our products, new videos and fresh modeling concepts. Start exploring and come back often to check out the constantly updated information and current hobby ideas.