Showing posts with label Crafts. Show all posts

Thursday, October 6, 2016

Among the Shades of Green

Among the Shades of Green

If you are new to building scenery or an old hand at the craft, a good place to polish up your skills in adding scenery to a flat, open field.

Not only will this exercise quickly change the look of your layout but is also an example of tricking the eye into seeing more than is actually there. 


To get started, seal the area with flat earth colored latex paint. This is available at every paint and home improvement store. Custom mixed quarts and gallons can be mixed to order or for smaller jobs, many stores offer paint samples in smaller sizes for only a few dollars. One can also use acrylic craft paints that are sold at craft stores. This paint will provide a base for additional layers of scenery materials that will be applied in stages. 

With the base coat dry, apply an even layer of full strength scenery cement and sift a thin layer of earth colored fine turf into the glue. A light misting of water with a few drops of liquid detergent over top of this layer will help the glue penetrate the turf to firmly affix this starter course. An alternative for this base coat of turf when covering a flat surface is to cut a piece of earth colored grass mat material to size and glue in place. 


The field will start to come to life when a thinned half glue and half water mixture of scenery cement is applied over the earth turf and a light coat of moss green is sifted over top. Make certain to leave some open spots and vary the depth of the green turf. Mist over this first green layer with the spray bottle with the ‘wet’ water and allow it to dry.

Mist the field with the spray bottle and very lightly sift a thin layer of grass green turf followed by an equally thin application of yellow turf to provide high lights. Work from the front of the project to the rear adding more of the darker green to the foreground and more lighter highlights towards the rear. This will simulate have the eye sees closer objects as being darker and object farther away are usually seen as being lighter.

Mix up a spray bottle with four parts water, one part scenery cement and a couple of drops of liquid detergent. Now lightly spray the glue mix over the entire field. While the field is still wet randomly scatter some dark green coarse turf to simulate those random darkly colored weeds that seem to spring up in almost every field. Over spray this layer with the glue mixture as well. 


At this juncture the field has taken shape. The variety of colors and textures not only adds realism to the scene but also creates the illusion of size and depth. The various shades appear to have added relief to an otherwise completely flat surface. The next step is to add additional detail to the field with the inclusion of larger scrubs and bushes made using foliage clumps and by adding some trees along the edge plus a simple fence constructed of fancy tooth picks and rust colored thread. Tall grasses created by the use of JTT detachable wheat and flower bushes flank the right of way to clearly define open fields from busy main line. The different colors and textures along with a few other details will enhance the realism of an otherwise simple scene. 
Author:George Riley

This article is from "Detailing Scenery with MRC - JTT Landscaping Tips and Techniques.
CLICK HERE to download the entire magazine.


Materials used for this project
  • 95128 Fine Earth Turf or 95411 Golden Straw Grass Mat
  • 95134 Burnt Grass Ground Cover Turf fine
  • 95132 Yellow Straw Ground Cover Turf fine
  • 95138 Dark Green Ground Cover Turf fine
  • 95008 Grass Green Ground Cover Turf Medium
  • 95137 Moss Green Ground Cover Turf Coarse
  • 95139 Dark Green Ground Cover Turf Course
  • 95146 Blossom Flowering Turfs Medium
  • 95057 Light Green Foliage-Fiber Cluster Coarse
  • 95058 Medium Green Foliage-Fiber Cluster Coarse
  • 95581 Detachable flower bushes
  • 95579 Detachable Wheat Bushes
  • Saplings (1 pack ea.)
  • 3 or 4 Assorted JTT Trees

Detailing Your Scenery

The Devil is in the details...


More than any other facet of model building, the construction of scenery provides the vehicle that not only adds an additional dimension to one’s models, but also enhances the realism of each subject. Scenery helps place each miniature creation in its ‘natural’ environment. So whether one is constructing a model railroad layout, building a military diorama, working on a school project or assembling a doll house your efforts can be improved by adding scenery to the project.

Effective scenery is not difficult to create. It requires only simple tools and construction techniques to complete any scene from the simplest to the most complex. While there is some ‘art’ involved in its application, most effective scenery only involves observation of the scene that one is attempting to capture and as is the case of any great model, attention to detail. 

Adding the details could not be simpler when using JTT Scenery products. All of the tedious tasks have already been done when using JTT plants and trees, all one has to do is ‘plant’ each item as it would appear in the natural world. Even large areas can be detailed quickly with the wide array of ground covers and other scenic products available from JTT. 

In order to help the novice get started as well as give some inspiration to those with more experience, this book is designed to provide a series of easy to complete projects using basic materials along with JTT Scenery products. Each project not only includes a complete list of materials used in its construction but also includes a number of easy to follow techniques for creating realistic scenery for any type of model building. – George Riley

This article is from "Detailing Scenery with MRC - JTT Landscaping Tips and Techniques.  CLICK HERE to download the entire magazine.


Wednesday, October 5, 2016

Creating a Realistic WWII Vignette with JTT Scenery Products

The following is an  article by Big Bill Schwarz, president NJIPMS


Creating a Realistic WWII Vignette with JTT Scenery Products 


My club, NJIPMS here in New Jersey does group builds about once a year. This year’s theme (2012) was 1/48th scale OTAKI models. The theme was to see what could be built out of these great old kits. The model pictured here is an OTAKI KI-44 TOJO. I usually put my models on a base to show perspective and natural surroundings. I wanted to show a remote pacific island in WWII. With the help of JTT Scenery, mission accomplished.

My base was made from a round wooden clock mounting base. After prepping and sanding the base for tooth to put the scenery on, I used carpenters glue and laid down the plank base on which the airplane sits. The planks are coffee stirrers from the dollar store which I stained for visual effect. Now comes the fun part. The initial ground work was laid down using Celluclay, tinted with tan latex house paint and mixed with white glue. I spread it on the base with an old knife, stippled it with an old paint brush and wiped off the edges. This gives a natural, uneven look to the ground. At this time, I also added the various JTT palm trees and hedges.  

Next up was a layer of diluted white glue on the ground to lay the turf on. I used a mixture of fine tan ballast, some shades of green turf, and around the trees and shrubbery I blended textures of foliage to simulate dead leaves and plants. When that was dry, I added the various flowering plants and some different brown turf textures to blend everything together. When that was all dry, I shot a clear flat coat tinted with a bit of khaki paint to tone down and blend in the colors. I was happy with the result. I mounted my TOJO and the base was complete as was the WWII pacific island theme. The pilot adds the final touch and he even has his Samurai sword.  

All of the products used on the base with the exception of one palm tree came directly from JTT Scenery Products. The palms, the hedges, the flowering plants, the sand colored ballast are all in the catalog. JTT has a broad line of trees, plants, hedges and scenic accessories. They are extremely easy to use and with a little work they’ll help you create the scenic environment you want to achieve. I recommend the use of JTT Scenery Products. I have been modeling for 30 some odd years and have used a lot of products for my vignettes and I would rank JTT Scenery Products right up there with the best. Look into their line of products and have fun. I certainly did.


Monday, October 3, 2016

Flowering Meadows and Grassland Landscaping

The following is an  article by Tom Staley, owner of Tom’s Train Station, Raleigh, NC.


Among the JTT scenery products introduced this year are two great items, flowering meadows and grassland landscaping, both of which are part of the Landscaping Detail Series.

Red

Yellow


Purple

The flowering meadows come in red (0595604), yellow (0595605), and purple (0595606). The grassland landscaping comes in green (0595601), wild (0595602), and golden (0595603). Now, you might not get excited until you open the packages and put it in your hand and start to use it. Versatile, they can be used in hundreds of places.

Both the flowering meadows and grassland landscaping come on 5” x 7” sheets. This allows you to glue the sheets directly to your layout. And being no two sheets are exactly alike, you can place the sheets next to each other and still attain realism and create maximum interest.  They also work in a random pattern.  I like cutting several flowering meadows bushes out of a sheet and gluing them randomly around my layout.  The three colors will make your layout landscaping pop out and look great. Because the bushes are different heights, they not only add beauty, they also give your layout a depth dimension.


Green


Wild


Golden

My favorite one was the green grassland landscaping (0595601).  All I had to do was to add a fence to it and add some cows and I had great fenced cattle pen.

The two products are easy to use and give your layout a neat look.  The hint of colors on the bushes is just another one the details that gives you that professional look.  You will get attention, I promise.

JTT has kept the cost affordable.  So don’t miss out on this new product…another must have!!
  

My tip of the month is an easy one for planting JTT fruit trees.  Place some of the available loose apple, orange, and lemon fruits on the ground under the trees, this will give a more authentic look to your orchard

Friday, September 30, 2016

Using JTT Sunflowers and JTT Corn Stalks.

Using JTT Sunflowers and JTT Corn Stalks.


JTT’s series of scale trees and landscaping continues to blossom with new and unique scenery products, including flowering hedges, corn stalks, sunflowers, tomato plants, fruit trees, grasses and more. These and other introductions have led to requests for techniques and ideas for creating more realistic layouts. This is the first in a continuing series… we’ll start with an article by Tom Staley on using JTT Sunflowers and JTT Corn Stalks.


I have been doing landscaping and teaching scenery classes for many years. When JTT introduced sunflowers and corn stalks, I was like a kid in a candy store. I always wanted to put sunflowers and fields of corn on my layout and now I can.  Both the sunflowers and corn stalks are available in HO scale at 1” and in O scale at 2”. Mixing both scales of sunflowers gives you a natural look. It enables you to mimic nature by showing both young and mature plants in the same area.

What I especially liked about both the sunflowers and the corn is that they look so real. Talk about putting the “WOW” in your layout, this will do it.  They are colorful, affordable and available. If you think about it, most modelers have too much green on their layouts. Adding JTT sunflowers with their yellow, brown and green hues, and bright, detailed corn stalks give you color, realism and pop. They add interest to your layout.

Landscaping Tips You Can Use


Prior to planting the sunflowers, sprinkle JTT leaves on the ground where you plan to place your sunflowers. Then make a 50/50 combination of white glue and water and mix well. Using an eye dropper put several drops of the glue mixture on the leaves. You’ll see the leaves darken providing a true, earthy look.

Before planting JTT corn, rake some leaves to make small, raised rows. You may want to put a few drops of alcohol (found at the drugstore) on the rows. Modelers refer to this as breaking the tension. Then, using an eye dropper, apply white glue. The alcohol helps the leaves absorb the white glue delivering more natural looking results. Once the leaves are prepared, you can plant your corn.


Putting sunflowers around old buildings, bridges, windmills and in your gardens is one of the easiest things you can do to add authenticity to your layout. Anyone, regardless of skill level, can do this and get excellent results.

Visit your local hobby dealer and start adding JTT scale landscaping and scenery products to your layout, you’ll be delighted with the final results.


Tuesday, September 27, 2016

An Italian Fighter Blends Into the North African Desert

An Italian Fighter Blends Into the North African Desert


I wanted to build a World War II Italian Fighter plane.  Being of Italian descent, and having an uncle who served in North Africa with the American Army in 1943, I have taken a special interest in this theater of war. The model chosen is a Hasegawa 1/48 scale Macchi C.202 Folgore. I wanted to create a desert scene where the subject plane blends into the base… which is the reason camouflage paint schemes are used. This model won a First place in the Air Category at our October monthly meeting and is in the running for Model of the Year in the air category.    

I started with a 10” inch semi-oval wooden base. I covered the entire base with white glue and applied a layer of Golden Straw Turf #0595116 and Yellow Straw Turf #0595118, then waited 24 hours for it to dry. I then applied a layer of Fine Tan Gravel #0595304, using diluted white glue which I sprayed on the base. After this dried, I applied Dark Green Foliage-Fiber Clusters #0595068 in small, tight patches using thick white glue. I then added a 6” Royal Palm Tree #0596010 and a 9”, slightly cut down Palm Tree#0596009. I planted them by drilling holes and then applying CA glue. I think the finished product speaks for itself. I had never used or built bases for my models before. These easy to use JTT Scenery Products made “landscaping” simple. 

In the future, I expect to present all my models on finished bases.

A German Panzer Races Across Poland in 1940


A German Panzer Races Across Poland in 1940 


As a member of NJIPMS, I participated in a group build of a 1/35 scale Tamiya AFV. I chose the Panzer Type 2 Ausf F. I usually don't put my models on a base, but thought that this would be a good time to step up my presentations. I wanted to create a scene of a tank racing cross country through the fields outside of Warsaw, Poland in September, 1940. 

I used an oval-shaped wooden 8” base. I applied white glue and added Burnt Grass #0595121, Moss Green #0595122 and Forest Green #0595094 Turfs. When they dried on the base, I used thick white glue to add Dark Green Foliage Fiber Clusters #0595059 and Natural Brown Field Grass #0595084. I then drilled a hole in the base for a 6" Ash Tree #0596058. 

All the products I used were from JTT Scenery Products. I am proud of the finished product. Thanks to JTT Scenery Products and Model Rectifier Coporation with their fine line of easy to use products, I can see my Panzer tank in action rumbling through Poland

1941 T34/76 Russian Tank in the Ukrainian Countryside

Articles and layouts by Vince D'Alessio, member of NJIPMS


1941 T34/76 Russian Tank in the Ukrainian Countryside


As a member of NJIPMS, I took part in a group build of a Tamiya 1/48 scale AFV. I chose the T34/76 1941 version Russian Tank. This model recently took best out of the box at the Hudson Valley Historical Miniatures Guild Contest. This is my second attempt to build with a base. I chose a wooden pine 11” by 8”. My concept was to capture a vision of the T/34 in motion, moving into position to cut off the German advance through the Ukrainian countryside.

I first applied white glue to the base. Then I added Ground Cover Turfs, Soil #0595113, Earth #0595128, Golden Straw #0595116 and Burnt Grass #0595120. They were allowed to dry for approximately 24 hours. I then added Blended Turfs Green #0595105 and Autumn Blend #0595107. 

I sprayed finely diluted white glue on top of this and allowed it to dry for 24 hours. Next, I wanted to add gravel to the edges of the base. This was done by applying Earth Medium Blend #0595311, again sprayed with diluted white glue and allowed to dry for 24 hours. I then placed Flower Bushes #0595505 using thick white glue to position them. Next came two trees, a 5” Live Oak Tree #0596043 and an 8” Pine Tree #0596027. 

I planted them by drilling holes and applying CA adhesive. I am very happy with the finished base, as it adds yet another dimension to this award winning model.

Monday, September 26, 2016

Plant an Orchard on your Layout

The following article and layouts by George Riley, Railroad Model Craftsman
Plant an Orchard on your Layout

Properly modeled, orchards can enhance a model railroad's scenery as well as providing a potential source of traffic. Several packs of JTT Orange Trees were used to create this orange grove scene; nearly any type of orchard can be modeled by planting the proper trees. Add a processing or packing plant nearby and your railroad can have a new customer in no time!

From their earliest years in operation, the railroads played a crucial role in feeding the nation’s growing cities. Food stuffs and agricultural products were among some of the first consigned revenue producing lading to ply the rails. Fruit and nuts from recently planted orchards shared space with the vegetables, grain and livestock that funneled into the rapidly expanding eastern and Midwestern cities during the first half of the nineteenth century.

While orchards were not a uniquely European enterprise, the Native Americans had originally planted orchards in the pre-Columbian era; they spread from coast to coast during the westward expansion of these immigrants. From the citrus groves of California and Florida; to the apple orchards of the Mid Atlantic and Midwestern States and the peach orchards of Georgia and the Carolinas, fruit production and processing plays an important part in the country’s economy and provides an important seasonal revue stream to many railroads.

Properly modeled, orchards can enhance a model railroad's scenery as well as providing a potential source of traffic. With a little research and by carefully observing the scientific practices of fruit production one can present a realistic model of this common agricultural enterprise.


Begin by laying out the area that will be planted on the layout or as is the case of our orange grove, a piece of birch plywood that will later be added to the layout. Orchards are arranged so that a tree will produce the maximum yield in the minimum of space while allowing access for cultivation and harvesting. Holes were drilled in rows two inches apart with three inches between each row to accommodate a service path and still leave space between the trees. Another ‘trick’ used to make the orchard look larger was to lay out the rows on a curve. This fools the eye since while we can easily measure by eye the distance of a straight line while a curved line’s length is much more difficult to determine.


After the holes for the trees were drilled the board was sealed overall and the surface was primed and painted. This step not only helps stabilize the board and limits the effects of seasonal humidity, but also prevents the plywood from warping and the plys from separating when using water based glues and water to apply the ground cover.

A coat of 75% white glue or matt medium mixed with 25% water and a few drops of dishwashing liquid is applied over the entire surface to hold a thin layer of dirt onto the base. Water with a few drops of dishwashing liquid or denatured alcohol is then sprayed over the earth cover. Lightly wetting the dirt allows the adhesive to wick up through the ground cover to lock the earth in
place. Too much water will often cause the earth layer to crack which in many situations makes for added realism. Allow the dirt layer to completely dry before proceeding with the application of grass.
Leaving a roughly on inch earthen path between each row, apply a coat of the glue/water mixture over the earth ground cover. Add your choice of grass material to the glue and over spay with a light mist of the "wet" water. Allow the ground cover to dry completely. Once the grass layer is completely dry remove any excess material and give the entire area a light overspray of hairspray from a pump spay bottle. Inexpensive non-scented hairspray in pump bottles is readily available a most dollar stores.

Short static grass was used on the orange grove model to good effect. One does not necessary need to use a static grass applicator for this step since inexpensive squeeze bottles are available that yield good results when working with small areas.
Give the base an over all dry bushing with a light tan paint to accent the ground cover and add highlights. Plant the fruit trees in the predrilled holes. Hold them in place with a clear drying PVA glue such a Aleene’s Tacky Glue or Woodland Scenics Scenic Accents Glue. Several packs of JTT Orange Trees (Item #0592121) were used to assemble our orange grove scene. Nearly any type of orchard can be modeled by planting the proper representative fruit trees. Add a processing or packing plant nearby and your railroad can have a new customer.
*A version of this article was published on Railroad Model Craftsman Extra Board - March 2013. All photos are taken by the author George Riley. 

JTT Scenery Quick Tips

JTT makes a world of scenery that adds that professional touch to any model railroad, military model, diorama or even doll house.

All of the products are easy to use and will yield superior results. To illustrate some of the many ways that JTT Scenery can be used here are some quick, simple and effective scenery tips.

JTT Scenery Detail Sheets are a quick way to fill in that open patch of ground be it a vacant lot, small pasture or overgrown field. These sheets also let one model different environments and seasons.


Step 1 – Cut the sheet to fit the space. This can be done using a pair of scissors or hobby knife.

Step 2 – Remove the Kraft paper backing
Step 3 – Glue in place using scenery cement, matte medium or white glue. Once the glue is dry blend in the edges with some loose ground cover and the scenery is done. Simple, Easy, Fast.
Add Curb appeal to your residential areas.
The addition of flowering plants, shrubs and bushes around the yard will really add to the realism and detail of any residential scene.
Plant a vegetable garden out back.
Most family run farms as well as a lot of homes have a small plot set aside to grow vegetables and herbs for the kitchen. A couple of packs of JTT HO or O scale corn plants is a great start to any garden. Add a few rows of row crops and even a tomato plant or two to round out the selection. This will not only add detail, but will also be a focal point that will draw attention to the scene.
Mix and Match different products to replicate different times of the year.
A set of JTT O scale pumpkins coupled with some JTT dry vines sets the scene as the pumpkins are ready for the fall harvest.
Add Biodiversity to your project.
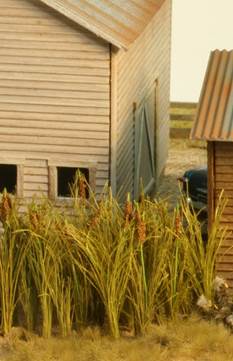
In the real world one will see a wide range of different plants in any scene. Don’t limit your model world to just a few species. Add a stand of JTT cat tails to that wet spot by the pond or some tall try grass, some dry leaves and a tree behind the shed.
Use different scenery products to create different seasons.
JTT scenery comes in a wide variety of seasonal types. Winter, spring, summer or fall can easily be realistically replicated. Here JTT dead tries, dry vines, loose leaf ground cover and dry leaf foliage branches create a convincing late fall forest scene.


Click here to learn more about our JTT line of Scenery Products
What's New & How To
Our ever-changing "What's New & How To" feature will highlight everything you want to know about MRC products and your hobby and market trends. There'll be how-to articles and new product announcements. You'll find FAQs on our products, new videos and fresh modeling concepts. Start exploring and come back often to check out the constantly updated information and current hobby ideas.